
The Autoresponder module, which is hosted within the Communications Module, will serve as the tool that will send automatic emails as responses to certain actions of your leads or donors through the afrus forms
What can you do with this module?
Remember that autoresponders are linked to campaigns and forms, so you can create transversal autoresponders for all campaigns, or different autoresponders for each of your afrus campaigns.
- Create and configure templates with the module editor
- Add images and edit texts with the styles you prefer.
- Add buttons (CTA) within the email.
- Define the group of recipients, whether it is a campaign or a specific form.
- Choose different languages for each Email
- You can activate or deactivate it to send it whenever you need
- Keep track of the emails sent, checking the status, opening date, sending date, recipient.
- Give bounce classification to ineligible emails
The responses you can configure are for the following events:
- Failed Donation
- Registered Donation
- Registered Subscription
- Subscription Failed
- Registered Lead
- Failed Lead
We invite you to watch the following video tutorial on how to create your autoresponders
Step by step to configure your Autoresponders:
1. Enter the Left menu in the AUTORESPONDERS section:
%204.23.37%20p.%C2%A0m..png)
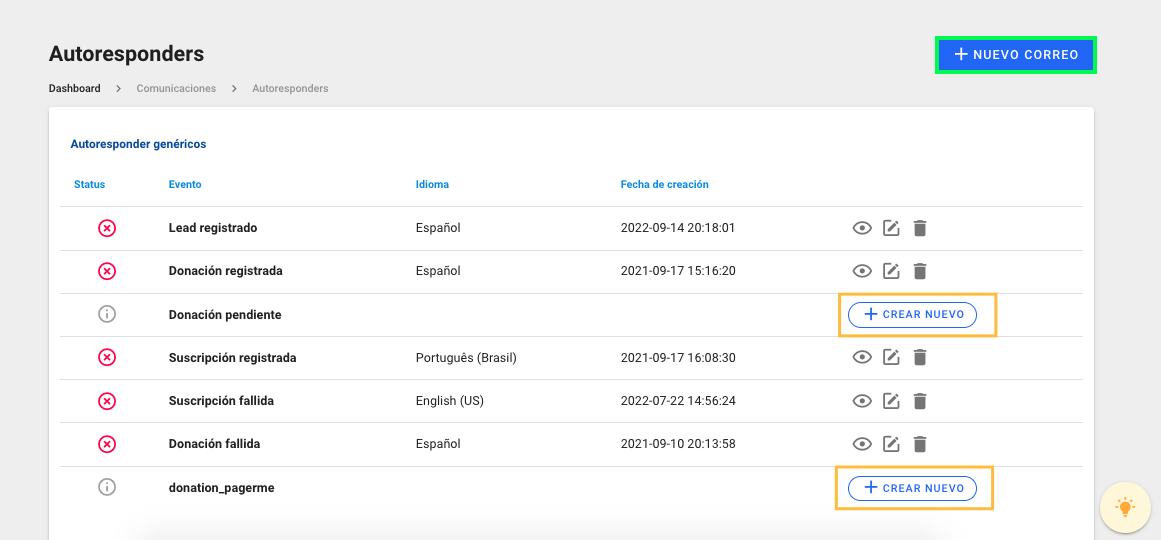
2. Then, by clicking on AUTORESPONDERS, you will enter the main page where you will find the list of active autoresponders, the campaign to which they belong and the language.
The page will show 3 types of autoresponders
- Generic autoresponders: which are general autoresponders, which are transversal to all campaigns.
- Here you will see all the available events, and you will be able to know which events an active autoresponder has, as you will see the language and the creation date.
- Events that do not have an active autoresponder will have the +CREATE NEW button available.
%203.10.59%20p.%C2%A0m..png)
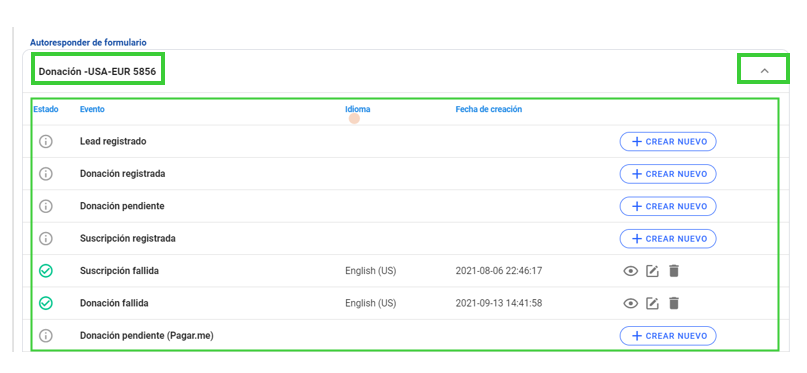
- Autoresponder by campaign: you will find the list of active campaigns, so you can display each campaign and see the autoresponders for each of them:
%203.17.59%20p.%C2%A0m..png)
- Here you will see all the available events, and you will be able to know which events an active autoresponder has, as you will see the language and the creation date.
- Events that do not have an active autoresponder will have the +CREATE NEW button available.
%203.20.46%20p.%C2%A0m..png)
- Autoresponder by form: you will find the list of active forms, so you can display each form and see the autoresponders for each of them:
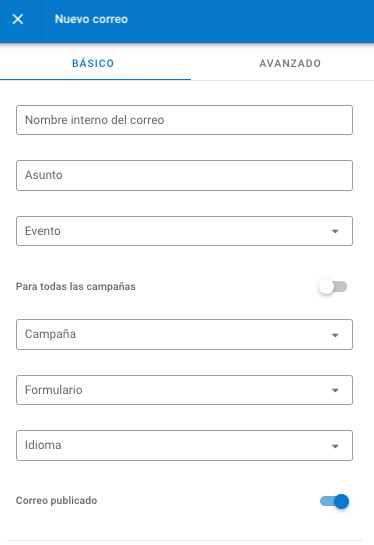
3. If you want to create a new Email, you must click on the blue button located at the top right or on the button in front of each event called +CREATE NEW
4. Then the new email editing panel will open, you will start with the Basic configuration, fill in the data according to the information you want to configure:
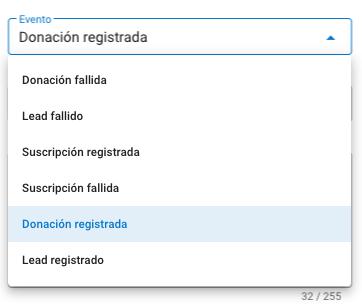
The event is the action that was generated through the AFRUS form, a successful or unsuccessful donation, a successful or unsuccessful registration, a successful or unsuccessful recurrence. You can make a response for each event:
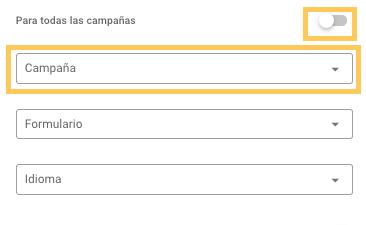
5. You can configure this autoresponder for a specific campaign and form or all campaigns, you just have to activate the option:
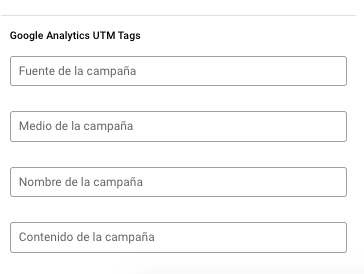
6. You can also configure the UTM's of your campaign to track the traffic and behavior of your autoresponder:
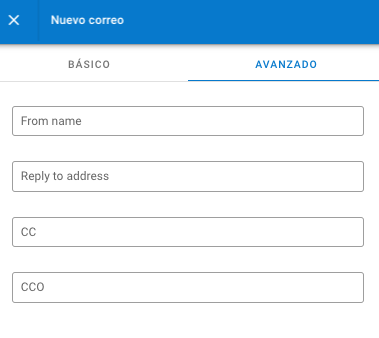
7. Then, click on ADVANCED to configure the other fields, here you will configure the sender name, if you want to put an email where the autoresponders can respond you can do it in Reply, if you want to send copies and blind copies you can enter the corresponding emails:
8. After configuring the basic and advanced data, you must select the autoresponder design template, you can choose between using a previously created one,
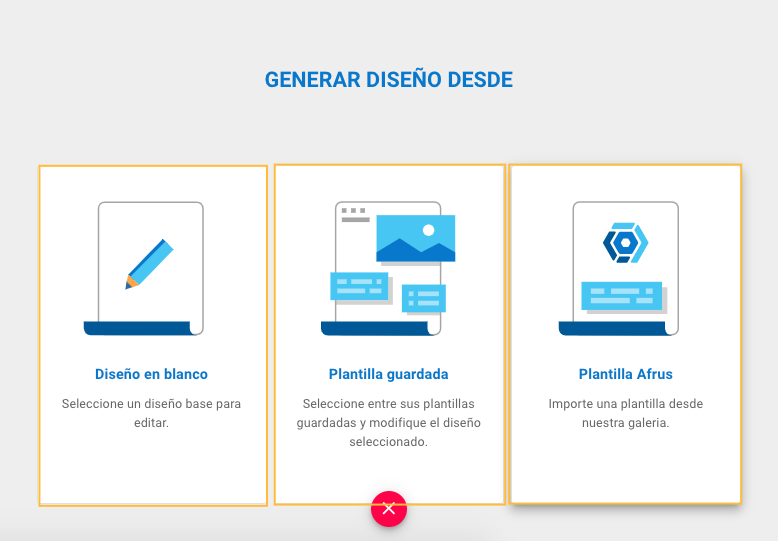
- Blank design: Start a design from scratch.
- Saved Template: Designs you have used or designs saved for future use.
- afrus templates: Designs recommended by afrus, you will only have to replace texts and images.
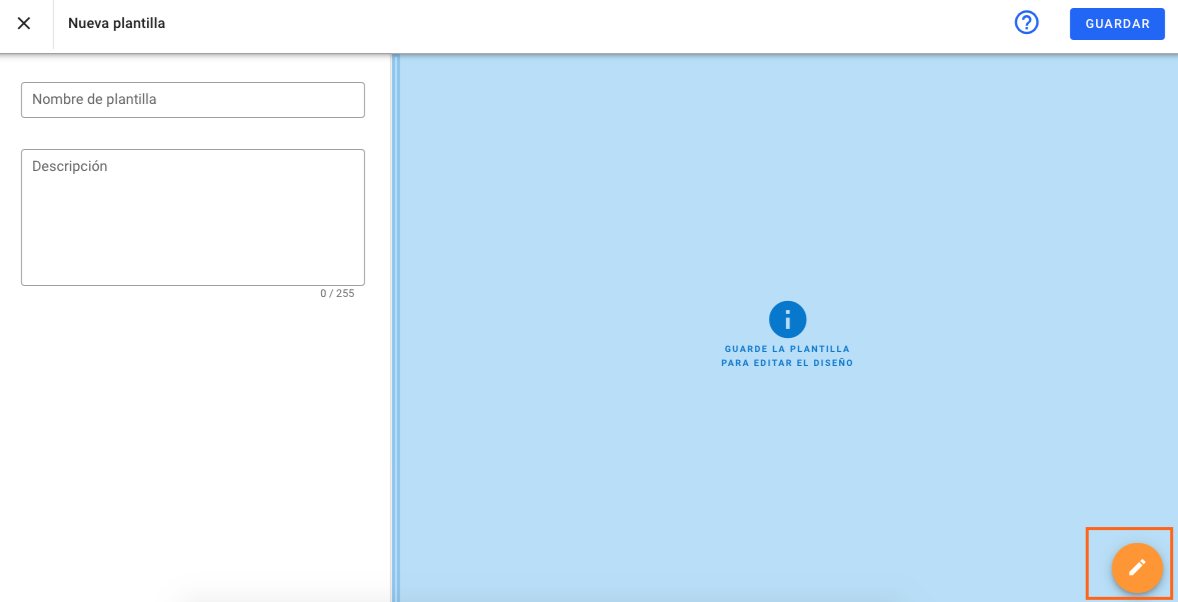
9. By selecting BLANK TEMPLATE as an option, you will enter the editor, to create the autoresponder, you will first fill out the template information and its description.
%206.31.04%20p.%C2%A0m..png)
12. T hen to access the editor, click on the orange pencil, located at the bottom right.
13. To start editing, you must drag any of the options from the panel on the right, and then you must drop them in the light blue box in the center:
%206.37.06%20p.%C2%A0m..png)
14. Just as we show you in the following video:
15. Once the template is created, you must click SAVE so that the autoresponder is created .
%206.39.41%20p.%C2%A0m..png)
16. Finally, click on SAVE and the autoresponder is now configured and listed.
%204.16.19%20p.%C2%A0m..png)